Rise Baking Lab Days 2/3

Hi Early Risers,
Thank you so much for your patience with me! This week has been crazy. As I evolve my business, my workload has really increased and while Substack is a huge, special, intimate part of my work, I had a few things that I needed to get done before I had the mental capacity and time to work on writing this in depth article on what I learned at Rise Baking Lab. I highly recommend their classes, and I really enjoyed working with Luis and Mark. They both have fun Instagram accounts, especially Luis. Now, to get to the learning.
Over days 2/3 we made a base baguette dough, but we separated it into several batches and added different ingredients to them to create different products. Graison, our third teacher and an expert on whole grain baking, pointed out that it’s very smart in a production (so, bakery) setting to mix one large batch of dough and then add different ingredients, shape it differently, and sell different items from one base dough. I think most of you are home bakers, but if you run a bakery and would like more information on that, please comment and I can work on that! The baguette dough had a miniscule amount of both dried yeast and sourdough starter, was mixed at a very low hydration and then sat for THREE HOURS!!! Graison explained that you get some “lift” during that time, so when you add the additional ingredients later (salt, more water, more mixing), the bulk fermentation time is very short (only 60-90 minutes) and then you can put the dough right into the fridge overnight. He thinks in production terms a lot, so this method may not be useful for you at home. I’m still thinking on if I want to share more on this method or use what I learn to adjust these techniques to speak to what a home baker would do. That’s what I’m learning towards. So, from one base baguette dough, we made these different things:
-
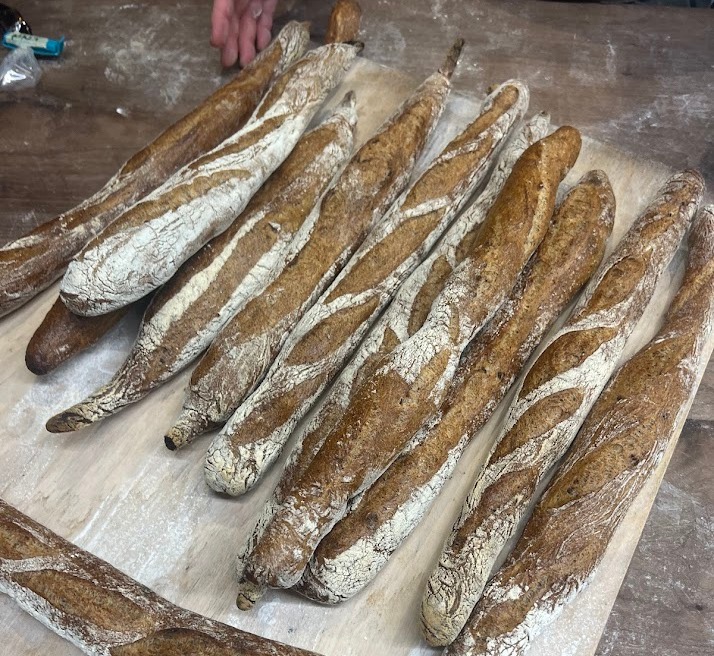
Baguettes, (of course) which weighed 400 grams each.
- This base dough does most of its fermentation at the beginning with the 3 hour rest after mixing, and then at least 12 hours in the fridge overnight.
- After coming out of the fridge, the dough got preshaped immediately, and Graison encouraged us to try to get the dough nicely shaped into a cylinder but without making it too tight- this is a common mistake in baguette shaping. If you preshape too tight, you wait forever for the dough to relax enough to shape it without it tearing. A crucial step in baguette making! He also made sure we preshaped it longer, vs stout and thick.
- Adding some flour to the top of the shaped baguettes helps with the poke test.
- I learned that most people use dried yeast in their doughs, but if you ever have fresh yeast and don’t know how to convert it into dry, it’s about a 1:3 ratio. For every 3 grams of fresh yeast, you use 1 gram dried.
-
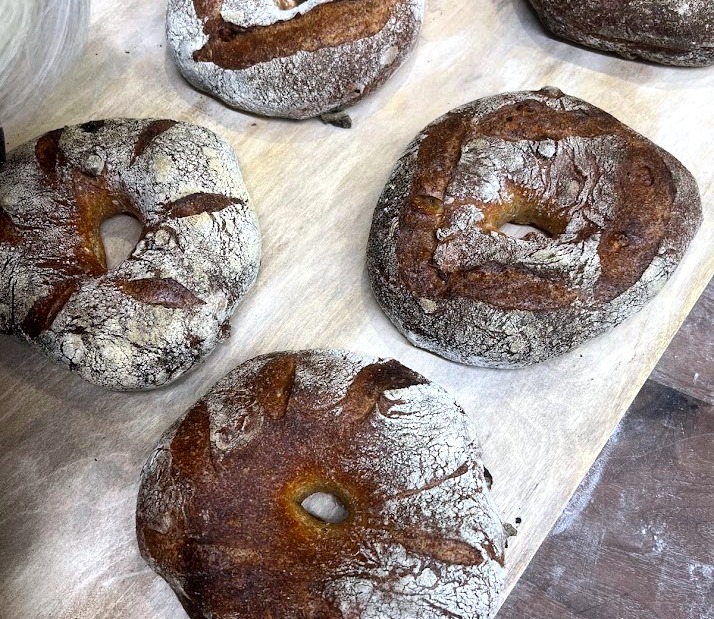
Couronne (round shape with a hole in the middle) that had rum macerated figs, roasted hazelnuts and cardamom) and we weighed each one to 500 grams.
-
The figs were macerated with half rum and half water, just enough liquid that all of the figs are fully submerged, and Graison said it can be from a few hours to many days (Kept in the fridge). We used about 14% inclusions to dough, with half being the figs, half hazelnuts, 1% cardamom.
-
-
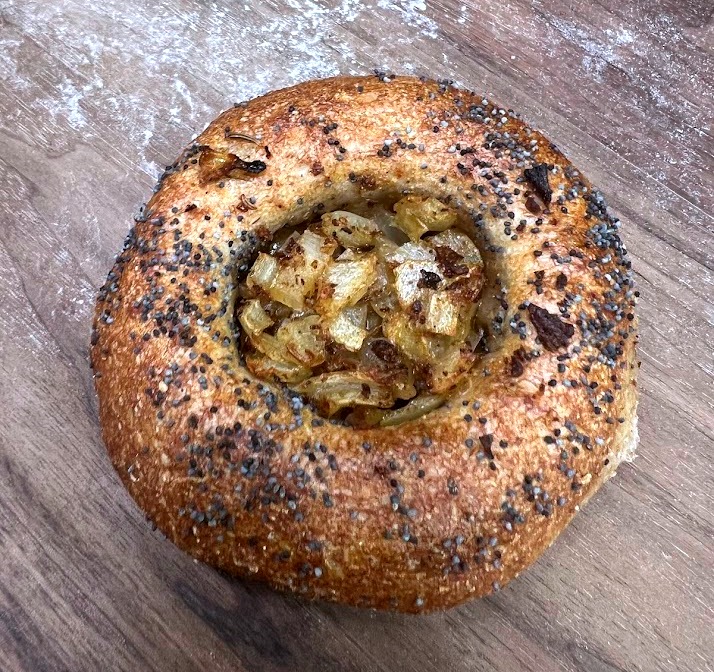
Bialys with poppy seeds, onions, caraway, paprika and garlic. These were each 100 grams. Bialys are a Polish baked good, traditionally made with natural (sourdough) fermentation, and served with poppy seeds, paprika and onions. It looks sort of like a bagel, but it doesn’t have a hole, just a crevice in the middle where you add fillings. This baked item was brought by immigrants from Poland to the Northeastern parts of the United States.
-
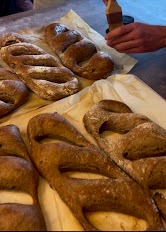
Fougasse, which is a free formed shape (so we preshaped it, but we didn’t shape it after that, we just used a bench knife to cut it and pull it into a pretty shape. It had sumac and kalamata olives. We weighed these out to 500 grams. I haven’t showed many Fougasse on my pages, would you all like to see more of this table centerpiece style bread? Less fussy and shaping than a baguette, but a nice crust to crumb ratio.
-
We also made the Italian ficelle, which is like a long and skinny baguette. We added a buckwheat scald, which is when you mix 1 part buckwheat flour to 3 parts water and heat it up until it thickens. Cool it down and add it to your base dough. We added 10% of that to the total dough amount. We weighed them each at 250 grams.
-
The last way that Graison shared we can adjust this dough to make another bread is adding 2-3% olive oil and 5% more water, and after the cold proofing, to cut it without shaping it and make it into a ciabatta. Ciabatta is a great bread for beginners because you do not have to shape it.
So, out of one base dough, which was 90-92% hydration (I Know!!!), we made 5 products. This dough has 60% whole wheat and 40% bread flour. While Graison obviously enjoys adding inclusions and other ingredients to his dough, he made an interesting point that I really liked:
“Flour is not just something you put in the mixer. Let the flour speak for itself. Don’t cover up the flour flavor.” - Graison Gill (His Substack is fantastic and I pay for it)
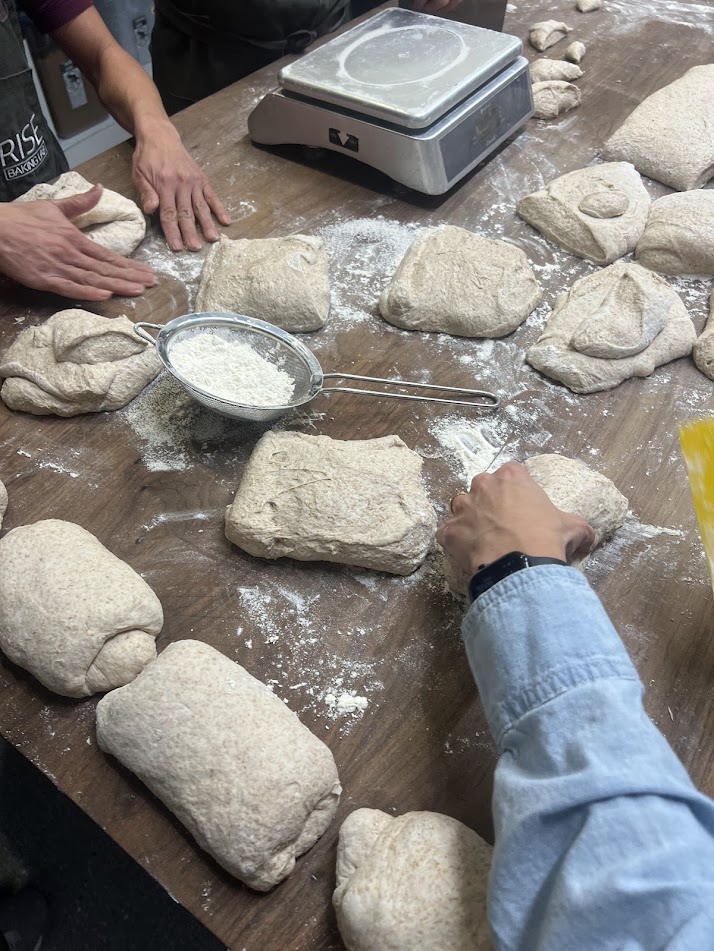
What does he mean by that? Well, I see so many people online make white flour only sourdough, and then add a ton of ingredients to the dough, and sometimes I wonder why they don’t make a tastier bread and then put flavors on top of it, like toast? And I am not telling anyone how to make bread for themselves, please do what you want. Make that cheddar jalapeno loaf, add those French onion ingredients! I am just offering a different perspective. Looking at bread as a means to nutrition, not just a white flour carb, opens up a whole new world to you. Enjoying a bit of couronne that doesn’t have a fig or hazelnut in it but then having both in the next bite is interesting and lets you enjoy the flavor of the grain along with the inclusions.
Other big takeaways:
-
MILLING!! This was a big topic. We discussed roller mills (the devil for whole grain lovers as they immediately strip the germ and bran from the endosperm and separate them), stone mills (a majority of small, high quality whole grain flour is made using these) and hammer mills (found less but retains the most oils and minerals in the grain). Would you like to learn more about that?
-
If you are trying to keep your dough warm but you don’t have a proofer, aim for very warm dough when it is done mixing. This is a lot easier to achieve with a mixer, because it creates friction. If you take your dough out of the bowl when hand mixing to knead it or slap and fold, it significantly cools down during that process and makes it really hard to get it back up to the temperature you need for faster fermentation. Even a primarily whole grain dough can take hours and hours to ferment if it’s cold.
- On that note, under fermented dough coming out of cold proofing can be “helped” by letting it sit out at room temperature before you bake it, but Graison pointed out that this is a reactive moment, and your goal is to be proactive.
- Proactive is putting the dough in a proofer or warm spot to ferment it at the right temperature, vs reactive is trying to finish proofing after the cold proof at room temperature to “fix” the dough.
- The best temperature for your proofer is the same as the temperature that the dough is, so that it’s at a constant temp. I often mix a little too cold, and then pump my proofer up, but if you’re not too far apart in the temperature ranges, it shouldn’t mess with your dough.
- On that note, under fermented dough coming out of cold proofing can be “helped” by letting it sit out at room temperature before you bake it, but Graison pointed out that this is a reactive moment, and your goal is to be proactive.
-
We also mixed a 100% whole grain brioche, and while it wasn’t perfect in the class, I was absolutely stunned by the flavor. It was one of the most delicious things I’ve ever tasted, and now I find myself on a mission to recreate it, test the recipe until it’s perfect, and then share it with you all. We topped it with a lemon and vanilla scented pastry cream and added blueberries and white chocolate. It was excellent.

- It was very hydrated with 62% milk.
- When adding butter to your brioche, it will always look like you messed up before it comes together again. It is hard for the dough to absorb and incorporate the fat, so be patient.
-
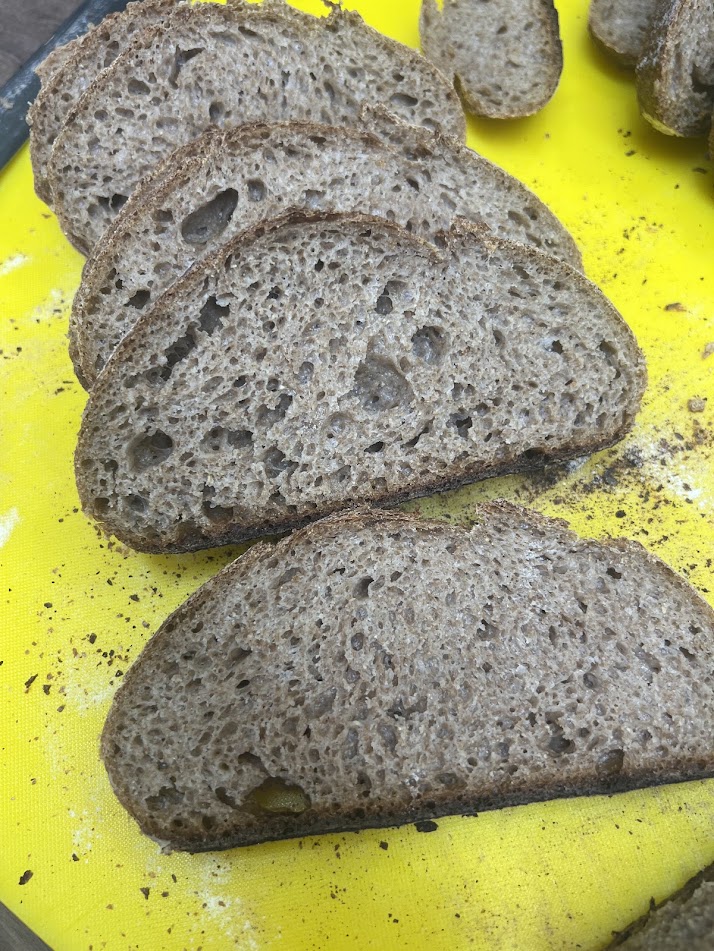
We also made a 100% country loaf, super hydrated at 92% water. I will work on recreating it at a smaller amount and share that recipe as soon as I can. The biggest takeaway from this was to fully develop the gluten at 70% hydration, let the dough rest, and then add the starter, salt, and additional water (this is called a bassinage)
.
-
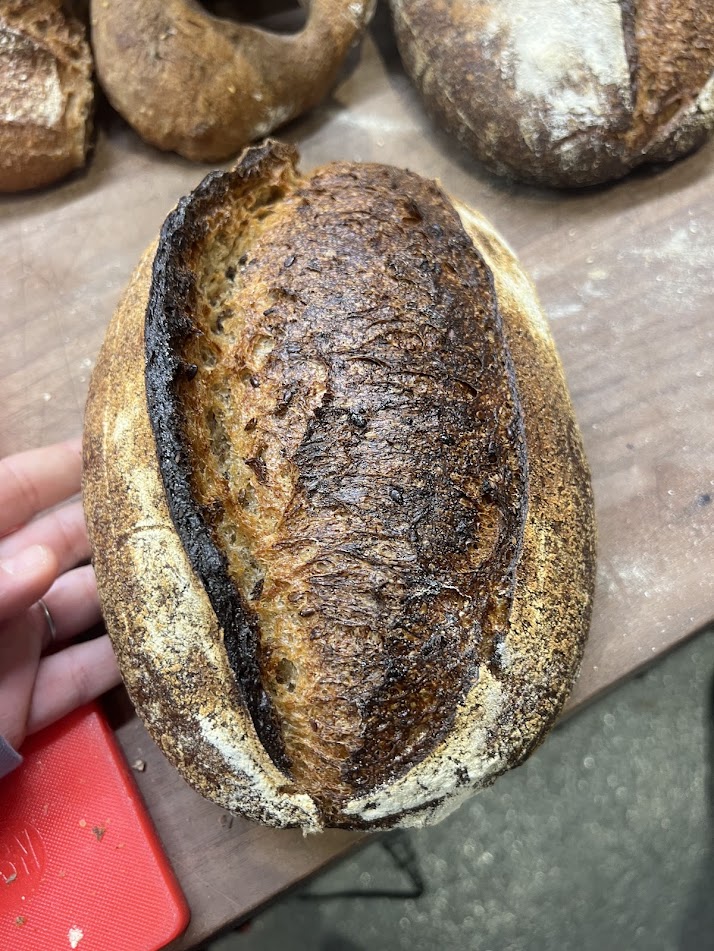
Similar to the country loaf dough, we made an oat porridge loaf. It was 40% bread flour, 50% whole wheat, 10% spelt. We added an oat porridge (which was just water and oats, cooked together and cooled), honey and flax seeds. Would you like me to work on that recipe and share it with you? We also held back everything except the flours and 70% water, let that fully develop, rested it, and then gradually mixed in everything else. This style of mixing is new to me and I am still digesting and experimenting until I fully get a grasp on it and can share the whole process with explanations with you
.
-
The last bread we made was a very interesting, very fast 100% rye. It had 50% rye starter in it, a soaker (which is cracked rye with beer), the beer was soaked with spruce leaves (which I could smell but not taste) and sunflower seeds. From mixing the dough to baking it was only about 90 minutes! WILD! The rye levain was mixed the day before though, so it does have some lead time.
-
Graison encouraged us to set a 30 minute timer each time you fold the dough and when folds are done to keep doing that. It only takes seconds to use your instincts and intuition to see where the dough is at during bulk fermentation, but if you wait 3 hours and the dough is over fermented, what then?
-
Graison pointed out that you’ll get a better result from some white flour + very finely milled whole grains than using more whole grains that are roughly milled. We tasted (yes, tasted) all sorts of flours and you can tell that home milled, rough milled grains don’t melt away and create a doughy texture in your mouth the same way as fine milled flour does, and this makes bread making much more difficult. I am going to work on a double milling process, where I set my mill to a wider setting, essentially “cracking” the grain into big pieces and then setting the mill to a fine setting to try to get as fine a texture as possible in from my mill. I have a Mockmill Professional 200.
-
How to score on under or over bread.
- When the dough seems small, cold, not ready after cold proofing, you can help it out by scoring it deeper.
- The opposite is also true, scoring much shallower and not as far on the surface of the dough will help over proofed or fermented dough puff up more when baking.
-
When you preshape any dough, think about the time you want it to be in preshape. If you want to shape it soon, don’t tighten the dough as much. If you want the dough to sit in preshape longer (like when you have many loaves to shape), make it tighter. Always start shaping the dough you preshaped first.
-
If you aren’t sure how your dough looks when its time to bake, sacrifice one and see how it turns out. Adjust from there, and take notes for next time
-
If your starter isn’t quite at peak or is very cold when you want to make dough, it will significantly slow down your bulk fermentation.
-
If you find yourself ready and willing to shop local when it comes to the grains in your bread, find a farm or miller as close to you and ask a lot of questions, so you know what the flour will behave like. The farmers and millers should be open to these questions and have the answers.
“Challenge your notion of what you think whole grains are.” Graison
I hope this article was interesting and informative for you. I really got a lot out of this class, and as a baker, you never stop learning. Rise Baking Lab offers a variety of classes so if you’re able, check them out. Please leave comments to let me know what else you’d like, any recipes that sound interesting that I can share with you, or any other thoughts you had reading this. Thank you for being here!
Laila